
Keepsakes by Melissa is featuring some awesome blog candy:
~ 1 pkg. Doodlebug Chunky Glitter Assortment (19.99)
~ 1 Zig Zag Stitch Edge & Emboss Punch by EK Success (14.99)
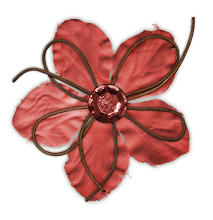
~ 1 pkg Flora Doodles by Petaloo (4.29)
~ 1 pkg. Doodlebug Jeweled Brads ~ Sugar Cones (3.99)
~ 1 set of Nestabilities Dies ~ Labels 3 (24.99)
Don't believe me!? Check it out!
Keeping my fingers crossed! One of these days I will actually win something!
Sunday, May 17, 2009
Thursday, May 14, 2009
Manly Cards
Cards for girls are easier. They can be pink, and full of ribbons or bows. They can sparkle and shine. But the challenge of making cards for my father and father-in-law limited my paper selections and made me thinking of new ways to add layers and still preserve the manly factor.
The tie came naturally (not another tie!), and I added details by selecting a paper that was geometric (cannot go wrong for that manly feel) and blocks of color that complimented the tie and paper. I found these tags that matched the stripes on the tie, and just added a little yarn for some dimension. I really like this pair, and hope that our dads do too!


caardvarks & 2S4Y Challenges
I LOVE particpating in challenges... especially the two from caardvarks and 2 Sketches for You. This card was inspired by the "Don't Quote Me, But..." caardvarks challenge, and Kazan's Sketch # 26.
I attempted to add depth and details to this project. I really spent time planning it all out, and tried with each item to add an extra layer or an embellishment. I'm really proud of the final product!


And I'm Back! With A Light Box...
The finals of second year have been finished. I have sat in the auditorium for a basic science lecture for the last time. Ahhh... how sweet these few days will be until I have to start studying again on Saturday for the real exam... the United State Medical Licencing Exam -- Step 1, aka "The Boards." Until then, I am going to be carding-it-up and allowing for my previously stifled creative juices to get a-flowing again!


My first post (which will be followed by many over the next few days) is sharing my attempt to make a light box so that I can take better pictures of my cards. The design is modified from the following websites:
As a disclaimer, I made this box with things sitting around our apartment, and in no way is it my final attempt. I just wanted to see if I would like it.
In place of a large box, I simply used a Sam's Club cereal box that we had.
I cut off the tabs on top of the box.
Then I cut out "windows" in 3 of the sides of the box, leaving the back intact.
I then used white poster board to make the "infinity white" background. To do this, you cut a piece of cardboard to the width of the back of the box, and tuck it in so that it sits in the box, covering the bottom and one of the sides -- WITHOUT creasing it. A crease will show in the photographs.
I then used some more poster board to cover two of the sides of the box. It was recommended to use a light fabric for this step. For the next one that I will make, I think I will use an old white t-shirt. I didn't, however, take pictures of this step. Sorry!
I would like to purchase an inexpensive desk lamp to serve as the light source that I can move around either from above the item that I'm capturing, or to place it from the sides to shine through the cloth/paper. Here's the first photograph. Not perfect. But I will attempt this again on a bigger and better scale!
Friday, May 1, 2009
Cuttlebug Challenges Spa Weekend
While I may not be carding-it-up for a while, that doesn't mean I've stopped looking at all of the inspirational work that the card making community creates each and everyday. And what better way to showcase it than with a spa!

Subscribe to:
Posts (Atom)
